honeywell t6 wifi install manual
Summary
Struggling with your Honeywell T6 WiFi thermostat install? Our simple, step-by-step manual & troubleshooting tips will get you comfy in no time!

Honeywell T6 WiFi Install Manual: A Comprehensive Plan
This manual details the Honeywell T6 Pro WiFi thermostat installation, covering component checks, WiFi connection, app setup, and troubleshooting․ It supports various Honeywell systems․
The Honeywell T6 Pro Smart Thermostat represents a significant advancement in home climate control, offering a blend of functionality, convenience, and energy efficiency․ This WiFi-enabled thermostat allows for remote access and control via the Honeywell Home app, providing users with the ability to manage their home’s temperature from anywhere․ It’s designed for ease of installation and compatibility with a wide range of heating and cooling systems․
The T6 Pro boasts a sleek, modern design with a user-friendly interface․ Beyond basic temperature adjustments, it supports advanced features like customizable schedules, geofencing, and smart alerts․ The thermostat’s compatibility extends to systems requiring a C-wire, and solutions are available for those without one, utilizing adapters like the Honeywell Standard Installation Adapter (J-box)․
This guide provides a comprehensive walkthrough of the installation process, from unboxing and component verification to WiFi connection and app setup․ It also addresses common troubleshooting steps and error code explanations, ensuring a smooth and successful experience for both DIY enthusiasts and professional installers․
Unboxing and Component Check
Upon opening your Honeywell T6 Pro package, carefully verify that all components are present and undamaged․ You should find the T6 Pro thermostat itself, the thermostat base (part of the UWP mounting system), a decorative cover plate designed for aesthetic integration with your wall, and the necessary mounting screws and wall anchors․

Also included are detailed installation instructions, often specific to different system types․ Check for the Honeywell Standard Installation Adapter (J-box adapter) if your system requires it, particularly if a C-wire is absent․ Ensure the packaging contains all wire labels for proper identification during the wiring process․
Inspect each component for any visible signs of damage incurred during shipping․ If anything is missing or appears defective, immediately contact Honeywell support or the retailer where you purchased the thermostat․ Retain the original packaging for potential returns or warranty claims․ A thorough component check upfront saves time and frustration later in the installation․
Safety Precautions Before Installation
Prior to commencing the installation of your Honeywell T6 Pro thermostat, safety is paramount․ Always disconnect power to your HVAC system at the breaker box to avoid electrical shock․ Confirm the power is off using a non-contact voltage tester․
Do not attempt installation if you are uncomfortable working with electrical wiring; consult a qualified HVAC technician․ Be mindful of potential asbestos in older homes when removing existing thermostats – professional abatement may be necessary․
Avoid installing the thermostat in direct sunlight or near sources of extreme heat or cold, as this can affect its accuracy․ Do not burn the product․ Read the installation guide thoroughly before beginning․ Ensure the work area is clean and well-lit․ Proper grounding is crucial; never bypass safety features․ Following these precautions ensures a safe and successful installation process․
Tools Required for Installation
Successfully installing your Honeywell T6 Pro WiFi thermostat requires a few essential tools․ A Phillips head screwdriver is crucial for mounting the base and cover plate․ A flathead screwdriver may be needed for certain wiring connections․ Wire strippers are essential for preparing the thermostat wires, ensuring clean and secure connections․
A non-contact voltage tester is vital for confirming power is off before working with wiring․ Pliers can assist with bending and manipulating wires․ A level ensures the thermostat is mounted straight for aesthetic appeal and accurate readings․ A drill with appropriate drill bits may be necessary if new mounting holes are required․
A pencil is useful for marking mounting hole locations․ The Honeywell Standard Installation Adapter (J-box adapter) might be needed depending on your existing wiring setup․ Finally, a smartphone or tablet with WiFi access is required for the initial setup and app registration․
Understanding the T6 Pro Mounting System (UWP)
The Honeywell T6 Pro utilizes a Universal Wall Plate (UWP) mounting system designed for compatibility with a wide range of existing installations․ This system simplifies the installation process by accommodating various hole patterns from previous thermostats; The UWP provides a secure and stable base for the thermostat, ensuring it remains firmly attached to the wall․
The UWP consists of a backplate with multiple mounting points․ These points allow for flexible positioning, minimizing the need to drill new holes in most cases․ The Honeywell Decorative Cover Plate then snaps securely onto the UWP, concealing the wiring and providing a clean, finished look․
Proper alignment of the UWP is crucial for both aesthetics and functionality․ Ensure the plate is level before securing it to the wall․ The system is designed to work seamlessly with the Honeywell Standard Installation Adapter (J-box adapter) if required for specific wiring configurations․
Compatibility Check: Existing Systems
Before installing the Honeywell T6 Pro, verifying compatibility with your existing HVAC system is essential․ The T6 Pro is generally compatible with most 24V heating and cooling systems, including furnaces, air conditioners, heat pumps, and boilers․ However, certain systems may require additional considerations․
Specifically, check if your system utilizes a C-wire (common wire)․ The T6 Pro often requires a C-wire for consistent power․ If a C-wire isn’t present, a C-wire adapter may be necessary – Honeywell offers solutions like the Standard Installation Adapter (J-box adapter)․ Systems with high-voltage wiring (110V or 220V) are not compatible․
Also, confirm your system isn’t a proprietary or communicating system that relies on a specific manufacturer’s thermostat․ While the T6 Pro offers broad compatibility, these specialized systems may present integration challenges․ Consult a professional if unsure about your system’s compatibility․
Wiring Basics: Identifying Your Wires
Before connecting the Honeywell T6 Pro, accurately identifying your existing thermostat wires is crucial for a successful installation․ Carefully remove your old thermostat, taking a photo of the wiring configuration for reference․ Common wire labels include R (power), W (heat), Y (cool), G (fan), and C (common)․
The R wire typically provides 24V power․ W controls heating, Y activates cooling, and G operates the fan․ The C-wire provides a constant power source, often required for WiFi connectivity․ Wire colors aren’t standardized; always rely on the terminal labels, not the color of the wire itself․
If wires are unlabeled, consult your HVAC system’s documentation or a qualified technician․ Incorrect wiring can damage your system or the thermostat․ Use a wire labeling kit if needed to clearly mark each wire before disconnecting it from the old thermostat․ Safety first – turn off power to your HVAC system at the breaker before handling any wires․
C-Wire Requirement and Solutions
The Honeywell T6 Pro WiFi thermostat often requires a C-wire (common wire) for consistent power, especially for maintaining WiFi connectivity and advanced features․ Many older systems lack a C-wire, presenting an installation challenge․ Without a C-wire, the thermostat may draw power from other wires, causing system instability․
If you don’t have a C-wire, several solutions exist․ The Honeywell Standard Installation Adapter (J-box adapter) can repurpose an unused wire as a C-wire․ Alternatively, some HVAC systems allow you to utilize the G (fan) wire as a C-wire, though this may limit continuous fan operation․ Another option is to run a new wire from your furnace or air handler․
Carefully consider the implications of each solution before proceeding․ Consult a qualified HVAC technician if you’re unsure about wiring modifications․ Incorrectly adapting the wiring can damage your HVAC system or the thermostat․ Always prioritize safety and follow the manufacturer’s instructions․
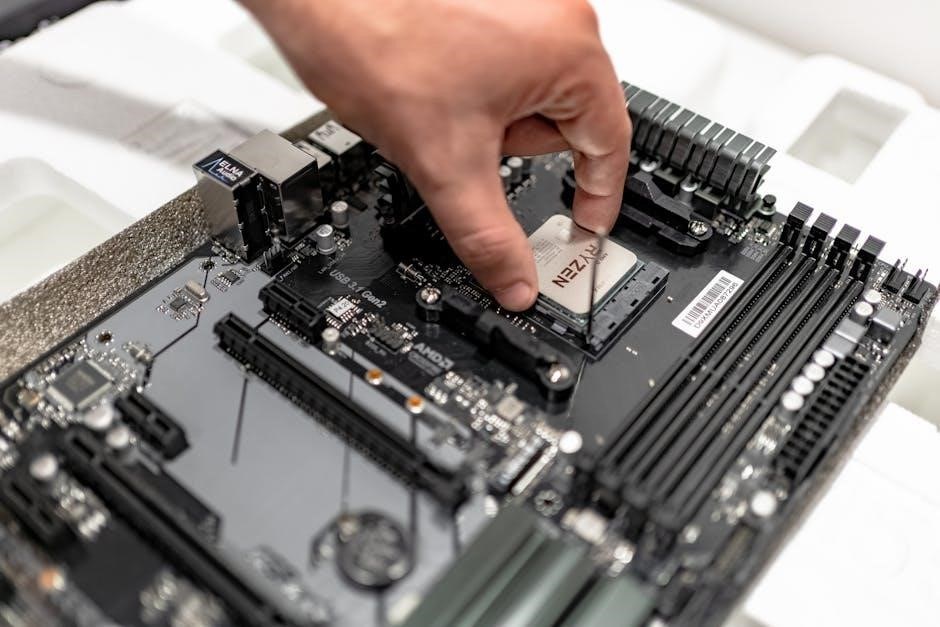
Installing the T6 Pro Thermostat Base
Before installing the Honeywell T6 Pro base, ensure power is completely shut off at the breaker to your HVAC system․ Remove your old thermostat, carefully labeling the wires as you disconnect them – this is crucial for correct reconnection․ Utilize the provided wall label stickers for clear identification․
The T6 Pro utilizes a Universal Mounting Plate (UWP) system․ Position the UWP on the wall, ensuring it’s level using a spirit level․ Mark the screw holes and drill pilot holes if necessary, using appropriate wall anchors for secure mounting․ Attach the UWP to the wall using the provided screws․
Now, connect the wires to the corresponding terminals on the T6 Pro base, referencing your wire labels and the installation guide․ Ensure each wire is firmly seated in its terminal․ Gently push any excess wire back into the wall opening․ Finally, snap the T6 Pro base onto the mounted UWP – it should click securely into place․
Attaching the Honeywell Decorative Cover Plate
Once the T6 Pro thermostat base is securely mounted and wired, you can proceed with attaching the decorative cover plate․ This plate provides a finished, aesthetically pleasing look to your Honeywell thermostat․ Carefully align the cover plate with the base, ensuring it sits flush against the wall․
The cover plate is designed to snap into place with minimal effort․ Gently press the top of the cover plate until you hear a distinct click, indicating it’s securely attached to the base․ Avoid excessive force, as this could potentially damage the thermostat or the cover plate itself․ Inspect the edges of the cover plate to confirm a seamless fit․
If the cover plate doesn’t align properly, double-check that the base is level and that all wires are neatly tucked away inside the wall cavity․ A slight adjustment of the base might be necessary․ The Honeywell Standard Installation Adapter (J-box adapter) may affect alignment; ensure proper use if applicable․
Powering On and Initial Setup
After securely installing the T6 Pro base and attaching the decorative cover plate, it’s time to power on the thermostat and begin the initial setup․ Restore power to your HVAC system at the breaker․ The T6 Pro should automatically power on, displaying the Honeywell welcome screen․
The thermostat will guide you through a series of initial configuration steps․ This includes selecting your preferred language, date, and time format (12h or 24h)․ Pay close attention to these settings, as they impact the thermostat’s functionality․ You may be prompted to select your system type – heat pump, forced air, or conventional heating/cooling․
If a C-wire wasn’t present, and you utilized an adapter, ensure it’s correctly installed and functioning․ The initial setup also includes a system check, verifying proper wiring and communication with your HVAC equipment․ Follow the on-screen prompts carefully to complete this crucial step․ A factory reset may be needed if issues arise․
Connecting to WiFi Network
To unlock the full potential of your Honeywell T6 Pro, connecting it to your home WiFi network is essential․ From the thermostat’s main screen, navigate to the settings menu and select “WiFi․” The thermostat will begin scanning for available networks․
Choose your network from the list and enter your WiFi password using the on-screen keyboard․ Ensure the password is entered correctly, as incorrect credentials will prevent connection․ The thermostat will attempt to connect to the network, displaying a progress indicator․ A successful connection will be confirmed with a message and the WiFi icon appearing on the display․
If the connection fails, double-check your password, ensure your router is functioning correctly, and verify the thermostat is within range of the WiFi signal․ Troubleshooting common WiFi issues may be necessary․ Once connected, you can proceed with registering the thermostat with the Honeywell Home app․
Registering the Thermostat with Honeywell Home App
With your Honeywell T6 Pro connected to WiFi, the next step is registering it with the Honeywell Home app․ Download and install the Honeywell Home app from your device’s app store (iOS or Android)․ Create an account or log in if you already have one․

Within the app, select “Add a Device” and follow the on-screen instructions․ The app will guide you through the process, typically involving scanning a QR code located on the thermostat or entering its serial number․ Ensure the thermostat is powered on and connected to the same WiFi network as your mobile device․
Once the thermostat is recognized, you’ll be prompted to name it and assign it to a location within your home․ This allows for easy management of multiple thermostats․ Successful registration unlocks remote control, scheduling, and other smart features via the app․ Honeywell Home utilizes licensing from Honeywell International, Inc․
Navigating the Honeywell Home App Interface
The Honeywell Home app provides a centralized hub for controlling your T6 Pro thermostat․ The main dashboard displays the current temperature, setpoint, and operating mode (Heat, Cool, Auto)․ Tap the thermostat icon to access detailed controls․
From the thermostat control screen, you can adjust the temperature, change modes, and view humidity levels․ The “Schedule” tab allows you to create and edit heating and cooling schedules, optimizing energy usage․ Geofencing features can be configured here, automatically adjusting the temperature based on your location․
The app’s menu (typically accessed via three lines or a “More” tab) provides access to settings, device information, and support resources․ You can manage multiple thermostats, users, and alerts from this menu․ Explore the app to familiarize yourself with its features and customize it to your preferences for optimal comfort and control․
Setting Up Schedules and Geofencing
The Honeywell Home app simplifies creating customized heating and cooling schedules․ Within the “Schedule” section, you can define different temperature setpoints for various times of the day and days of the week․ This allows for energy savings by automatically adjusting the temperature when you’re asleep or away;
Geofencing utilizes your smartphone’s location to trigger thermostat adjustments․ Configure a geofence radius around your home; when you leave, the thermostat can switch to an energy-saving “Away” mode․ Upon returning, it automatically reverts to your preferred comfort settings․ This feature requires location permissions within the app․
Experiment with different schedule and geofence settings to find the optimal balance between comfort and energy efficiency․ The app provides intuitive tools for editing and managing these features, ensuring a personalized climate control experience․ Regularly review and adjust settings based on your lifestyle changes․
Understanding Thermostat Modes (Heat, Cool, Auto)
The Honeywell T6 Pro offers three primary operating modes: Heat, Cool, and Auto․ In “Heat” mode, the thermostat activates the heating system when the room temperature falls below the setpoint, maintaining warmth․ Conversely, “Cool” mode engages the cooling system when the temperature exceeds the setpoint, providing cooling relief․

“Auto” mode intelligently switches between heating and cooling to maintain your desired temperature range․ You define both a heating and cooling setpoint, and the thermostat automatically selects the appropriate system based on the current room temperature․ This is ideal for climates with fluctuating temperatures․
Within the Honeywell Home app, you can easily select the desired mode․ Understanding these modes is crucial for optimizing comfort and energy efficiency․ Consider your local climate and personal preferences when choosing the most suitable operating mode for your home․ Experiment to find what works best!
Configuring Fan Settings
The Honeywell T6 Pro allows for flexible fan control, enhancing comfort and air circulation․ You can choose from “Auto,” “On,” and potentially “Circulate” (depending on model) settings within the Honeywell Home app or directly on the thermostat interface․
“Auto” mode runs the fan only during heating or cooling cycles, conserving energy․ Selecting “On” keeps the fan running continuously, providing consistent air movement and potentially improving air quality․ This can be beneficial for distributing air evenly throughout your home․
The “Circulate” setting, if available, intermittently runs the fan at a low speed, even when heating or cooling isn’t active․ This helps maintain consistent temperatures and prevent stagnant air․ Adjusting fan settings impacts energy consumption and comfort levels; experiment to find your preferred balance․ Proper fan configuration optimizes your HVAC system’s performance․
Factory Resetting the T6 Pro
Performing a factory reset on your Honeywell T6 Pro restores it to its original settings, clearing all personalized configurations, schedules, and WiFi connections․ This is useful for troubleshooting persistent issues or preparing the thermostat for a new user․
The reset process typically involves navigating the thermostat’s menu system․ Access the settings, then locate the “Reset” or “Factory Reset” option․ Confirm your decision, as this action is irreversible without re-installation and setup․ Be aware that currently, schedule, WiFi, and HomeKit resets are unsupported․
After a factory reset, you’ll need to re-connect the thermostat to your WiFi network and re-register it with the Honeywell Home app․ You’ll also need to recreate any custom schedules or preferences․ A factory reset effectively returns the T6 Pro to its out-of-the-box state, requiring a complete re-configuration․
Troubleshooting Common WiFi Connection Issues
Difficulty connecting your Honeywell T6 Pro to WiFi is a frequent issue․ First, ensure your router is functioning correctly and broadcasting a 2․4 GHz network – the T6 Pro doesn’t support 5 GHz․ Verify you’re entering the correct WiFi password; capitalization matters!
If the connection fails, try restarting both your router and the thermostat․ Move the thermostat closer to the router temporarily to rule out range issues․ Check for interference from other devices operating on the 2․4 GHz band․ Confirm your router’s security settings are compatible (WPA2 is generally recommended)․
Within the Honeywell Home app, ensure the thermostat is in pairing mode․ If problems persist, a factory reset (though limited in reset options) might help․ Remember that wireless features may be unsupported in some cases, requiring dealer assistance for replacement․ Consult Honeywell’s support resources for further guidance․
Addressing Error Codes and Alerts
The Honeywell T6 Pro displays error codes to indicate system malfunctions․ These alerts require prompt attention to ensure efficient heating and cooling․ Common codes relate to wiring issues, sensor failures, or communication problems with the Honeywell Home app․

Refer to the thermostat’s display or the Honeywell Home app for specific code definitions․ Wiring errors often necessitate re-checking connections, particularly the C-wire, which is crucial for consistent power․ Sensor failures may require professional replacement․ Communication errors can often be resolved by restarting the thermostat and verifying WiFi connectivity․
Some alerts indicate a failsafe condition is active (currently unsupported for reset via the app)․ If an error persists, consult the installation manual or Honeywell’s support website for detailed troubleshooting steps․ Ignoring error codes can lead to system damage or inefficient operation․ Document the code before seeking assistance․
Updating Thermostat Firmware
Maintaining up-to-date firmware on your Honeywell T6 Pro is crucial for optimal performance and security․ Honeywell regularly releases updates to address bugs, enhance features, and improve WiFi connectivity․ These updates are typically delivered automatically through the Honeywell Home app․
To check for updates, navigate to the thermostat’s settings within the app․ The app will indicate if an update is available and guide you through the installation process․ Ensure a stable WiFi connection during the update, as interruption can cause errors․ The thermostat may temporarily restart during the update process․
It’s recommended to allow automatic updates to ensure your thermostat always benefits from the latest improvements․ Firmware updates can resolve compatibility issues and enhance the overall user experience․ While updates are generally seamless, occasionally issues may arise; consult Honeywell’s support resources if needed․
Using the Honeywell Standard Installation Adapter (J-box)
The Honeywell Standard Installation Adapter, often referred to as a J-box adapter, is essential when your existing wiring doesn’t directly fit the T6 Pro’s baseplate․ This adapter provides a secure mounting point and facilitates proper wire connections, especially in older systems․
Installation involves carefully removing your old thermostat’s baseplate and mounting the J-box adapter using the provided screws․ Ensure the adapter is level and securely fastened to the wall․ Next, connect the thermostat wires to the corresponding terminals on the adapter, referencing your existing wiring diagram․
The adapter accommodates various wire gauges and configurations․ Once the wiring is complete, attach the T6 Pro baseplate to the J-box adapter․ Properly utilizing the adapter ensures a stable and reliable connection, preventing potential issues with thermostat operation․ Always prioritize safety and consult a professional if unsure․
Wireless Feature Limitations & Support
While the Honeywell T6 Pro boasts WiFi connectivity for remote control and scheduling, certain wireless features may have limitations․ Specifically, some functionalities, like HomeKit integration or advanced remote diagnostics, might be currently unsupported or require specific system configurations․
It’s crucial to understand that the T6 Pro relies on a stable WiFi network for optimal performance․ Interference or a weak signal can lead to connectivity issues and impact remote access․ Furthermore, the thermostat’s wireless capabilities are designed for standard home networks and may not be compatible with complex enterprise-level setups․
For technical support regarding wireless features, or if you encounter issues, Honeywell provides comprehensive resources on their website and through their customer service channels․ Contacting a qualified dealer is recommended if you require assistance with complex network configurations or troubleshooting․ Remember that some features may require firmware updates․